

Steppin' Razor
With my Kittiwake K2 (Crawdad) finished (and what a fine sailer she is!), I got the bug to build another. I decided to build a Razor 3 – a design by Bill Hagerup that he graciously gives away for free. Unlike the Kittiwake K2 kit, this was what’s called a scratch, “mid air” build: cut the pieces, tape them together, glue them (and pray!). I decided to name her “Steppin’ Razor” after the classic Reggae song by Peter Tosh – thus the Rasta (red – yellow – green – black) color scheme. I really can’t say enough about Del at G-Scale Graphics (my source for the custom self-adhesive vinyl lettering for all three of my boats). His work is great and very reasonably priced and his customer service ethics are impeccable! Steppin’ Razor is quick and fun to sail. Here’s a build log.
-
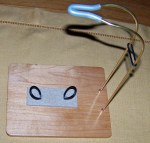
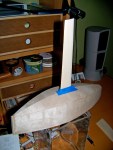
- The upper “O” ring snubbed up to the fin. “O” rings work, though I wouldn’t mind finding a more elastic alternative.
-

- I will better match the “O” ring diameters to the particular bulb on future productions, though this one functions just fine.
-
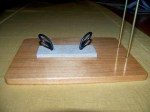
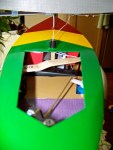
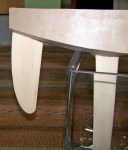
- …slid up to secure fin. Bottom “O” rings secure the bulb. The radius at the top of the verticals matches that of a jar of Martini olives 😉
-
- Another “O” ring, slid down the brass rod stand to allow insertion of the keel bulb…
-
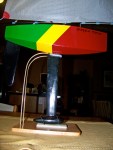
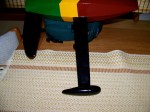
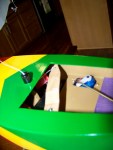
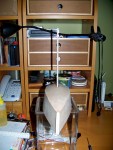
- This is Stand Mark II – the prototype holds my Pool Shark 3D. I’m happier with this effort, though there is still room for improvement.
-
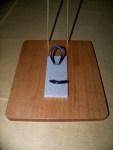
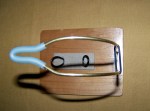
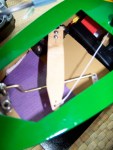
- “O” rings anchored to base to secure keel bulb. These protrude through sticky-back felt to cushion bulb.
-
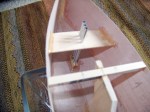
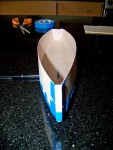
- I built a new stand for my Razor 3. The base is a maple grilling plank. Stand is 1/8” brass rod with fuel tube keel fin protection at tip.
-
- Running.
-

- No doubt in my mind, though, that Steppin’ Razor will kick Crawdad’s butt in any other conditions.
-
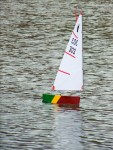
- Though I haven’t timed them, nor sailed them head-to-head, it feels like Crawdad might be a better very-light-wind sailer.
-

- After a bit of tuning, I’m very happy with the way she sails.
-
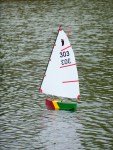
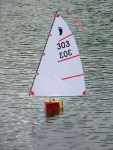
- On the water at Tualatin Commons Pond.
-
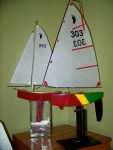
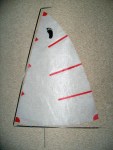
- Sail # 303 assigned by the American Model Yachting Association.
-
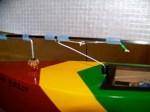
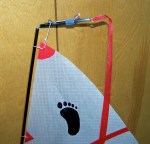
- C rig detail. I stole the quick-disconnect and sheet tensioning idea from Jan Peter Danse from the Netherlands.
-
- C rig on the boat.
-
- B and C rigs, side by side. Added glass beads to the pivot to raise the boom elevation.
-
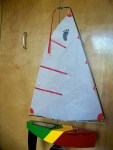
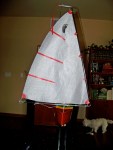
- Clear mylar deck cover. I think she’s ready for the water!
-
- Keel & rudder.
-
- Bow (with my second in command in the background).
-
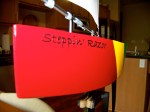
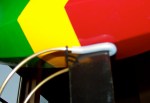
- Steppin’ Razor: custom self adhesive vinyl lettering from G-Scale Graphics!
-
- New sail servo arm, close hauled position.
-
- New sail servo arm: 1/16” basswood with two “break” angles reinforced with cyanoacrylate.
-
- My double sheeting pulley arm had design flaws so I replaced it with a simple arm. Fairlead through deck is an onyx bead.
-

- Keel weight (8 oz. sinker, adjusted to 204 g), attached to fin w/ countersunk screw + pin, coated w/ epoxy & microballoon mix.
-

- B sail tack.
-
- B sail clew. Two sliders here – one to adjust sail tension and the other to adjust sheet tension.
-
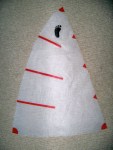
- B sail head. Neoprene tube slider to adjust tension.
-

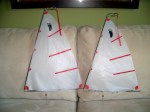
- B sail on rig. I suspect I may need to extend the boom tie-off at the clew to get more outhaul tension.
-
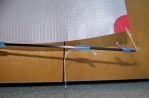
- “B” rig. Pivot is 3/32” SS rod. Boom & forespar carbon fiber. Boom attached w/ neoprene tubing.
-
- “B” sail. 1/2 oz. coated rip-stop nylon (trimming from a sail shop). Gussets and battens attached w/ iron-on tape.
-

- Zoey, 2nd in command at the Townsend Boatworks.
-
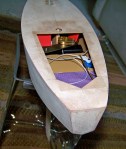
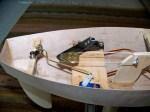
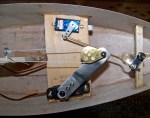
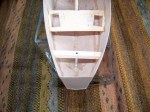
- Battery pack (3 AAA Lithiums) is velcroed aft of the fin. Receiver velcroed to the starboard side of fin.
-

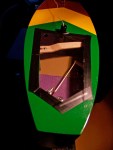
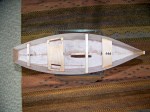
- I cut the deck opening wider fore (to allow access to battery pack) and longer aft (to allow access to rudder pivot arm).
-
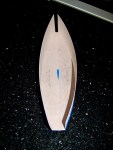
- Underside of the hull.
-
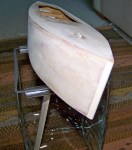
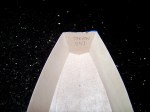
- Bow shot.
-

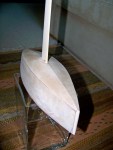
- From the side. It’s going to work.
-
- The deck is on! Here’s a tip from a newbie: cut your deck 1/8” oversize. It’s much easier to trim than to try to make fit.
-
- View of the installed rudder. Note that Bill H. recommends a carbon fiber rudder post w/ reinforcement at the top for clamping.
-
- Sail servo arm swung to “sail out” position. Allowing the pulley assembly to swing should keep the line from jumping the pulley.
-
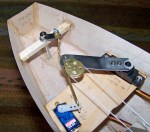
- Rudder pivot arm is set-screw collar epoxied to SS with brass clamping pivot pin.
-
- The lower end of the sheet is tied off – upper end will pass through fairlead in the deck.
-
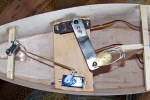
- Rudder pushrod (1/16” brass) bent to clear sail servo arm. I mounted the rudder servo to the underside of the tray for clearance.
-
- Servos and their arms, rudder pivot arm and pushrod installed. Brass pulley for “double sheeting” swings on the end of the SS arm.
-
- Rudder (3/16” basswood) & post (3/32” SS). I ground some flats in the embedded part of the rod to strengthen epoxy bond.
-
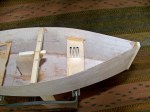
- Mast tubes set in 1/16” basswood thwart, which is as much for ease of construction as it is for structural integrity.
-
- Tubes. Note that Bill H. recommends carbon fiber material for tubes. A gram here, a gram there…
-
- Mast & rudder tubes (all 1/8”X.014” aluminum, into which 3/32” stainless steel rod fits quite nicely).
-
- Mast tube seat (1/4” basswood), angled and tapered to fit hull bottom and epoxied in place. Yes sir, yes sir, 3 mast tubes.
-
- Rudder tube (1/8”X.014” aluminum) held in place by 1/4” basswood thwart.
-

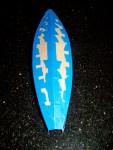
- Another view of the keel fin.
-
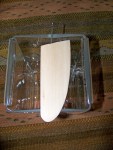
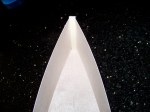
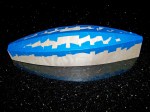
- Keel fin, front view.
-
- Keel fin. Masking tape is to contain the epoxy.
-
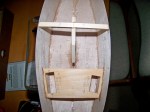
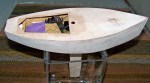
- Better view of the servo tray (1/16” basswood).
-
- Thwart and top of fin are at deck level, to be glued to the underside. The angle at top of fin is to clear the fairlead through deck.
-

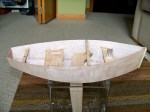
- All interior seams epoxied. Also, keel fin (3/16” basswood) and supporting thwart (1/4” basswood) plus servo tray epoxied in.
-

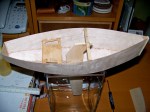
- A hull.
-
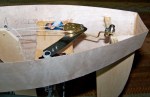
- I tacked the stern and bow pieces to sides and bottom with a little cyanoacrylate glue.
-
- And the bow piece.
-
- Next I taped in the stern.
-
- And another.
-
- Another view of the taped hull sides.
-
- Next I taped on the hull sides.
-

- The up side of the taped hull bottom.
-

- Following Bill’s instructions, first I taped the two pieces of the hull bottom together.
-
- Double sided tape made this so easy and came off the wood cleanly. No need for spray adhesive for this boy.
-
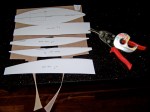
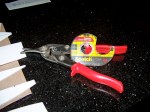
- Cutting the ply was easy with tin snips – could have done it with scissors, but I liked the control the snips gave me.
-
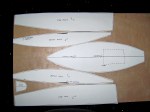
- Printed the patterns on 8 1/2” X 14” paper and used double sided tape to lay them out on a sheet of 1/64” aviation plywood.
